Sunday, April 14, 2013

Create studio photos - Still life (part 1)

 Be able to make photos in a studio
(Unit content 3)

Unit content 3 is all about working in studio, moving safety around studio, setting up equipments, developing ideas, using my existing knowledge about photography. So here I'm thinking about composition,framing,color,shape,line,texture, etc. Also, it's about practicing the new things that I've learned in class sessions, taking hundreds of images, making sure about I've used my best skills and the outcome is my highest result I could achieve. But, it's not the easiest thing in the world, because I always have to be creative, plan before the shootings, research and keep the files in safe places to prevent that maybe a virus annihilate them, as it happened with me a few times early on... Finally, don't forget to observe the health and safety rules too!!! There are sooo many things in a studio to watch out.

Right! So in the next 9 post you will see all of my studio works that I've produced since January. In this post, I'll start off with "Still life photography part 1". I separated it into 2 parts, the first is products and the second is fruits & flowers. These images are not edited because I want to show you my continuous improvement in studio photography. Sure, I could pump up the contrast and colors on each image or cut them etc. but I need to evaluate my photos by saying what's wrong or right with them and how can I improve my mistakes for the next time. But you will already see some improvement in my works looking through the images and don't worry I will show you my brilliant Photoshop/editing skills later on ;). Because I'm a perfectionist, It was easy to spot out the mistakes I did after I take the images, but at the end of this term I can really say that I've learned a lot about Studio photography. Luckily, I had some creative idea too and I've produced valuable images at the end that I AM happy with!!! 


Still life photography part 1
(Products)

TASK ONE

These photos under are my really first attempt of taking pictures of products in studio, on a scoop. They are simple images yet, because I've just got use to the settings and lightings. 

As you will see in my posts, I made some lighting diagram online for each of my image that has different set up to make everything clear about what lights,modifiers,reflectors and backgrounds I did use to create that certain image. On the image you can see the distance between the backdrop and the subject and the angle of the lights too. So yeah, I think this is the clearest and easiest way to show you how I've done things rather than explain it in words. Of course, I wrote some explanation where it was necessary. 


The next 2 images were taken by using the same set up for each shot.  
Here is the lighting diagram:
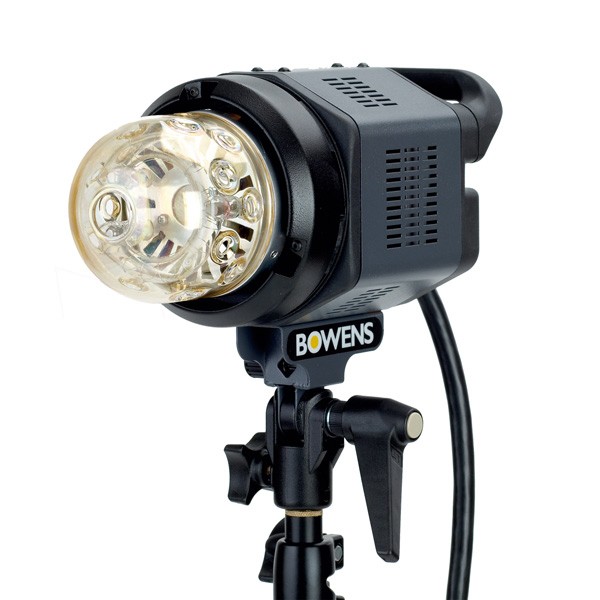


Studio equipments:

* product table
* one soft box
* weight
* large white reflector panel
* Canon EOS 550D (with 18-55 mm lens)


This kind of studio set up with one soft box shining from above could help you to eliminate harsh shadows and diffuse the light. Also, because the light had set up over the product you even more avoiding the strong shadows. 

The camera settings that I always start off in studio is... 


ISO-100     F/8     1/125s


My opinions about these images is that, that one light wasn't enough to brighten up the background to look like more high key (because I think these products would look better/stand out more if the background is bleached out white). So that's why I couldn't isolate the subjects good enough from the backdrop. I lost the contrast between the subject's color and background's color with this mid key/gray effect.

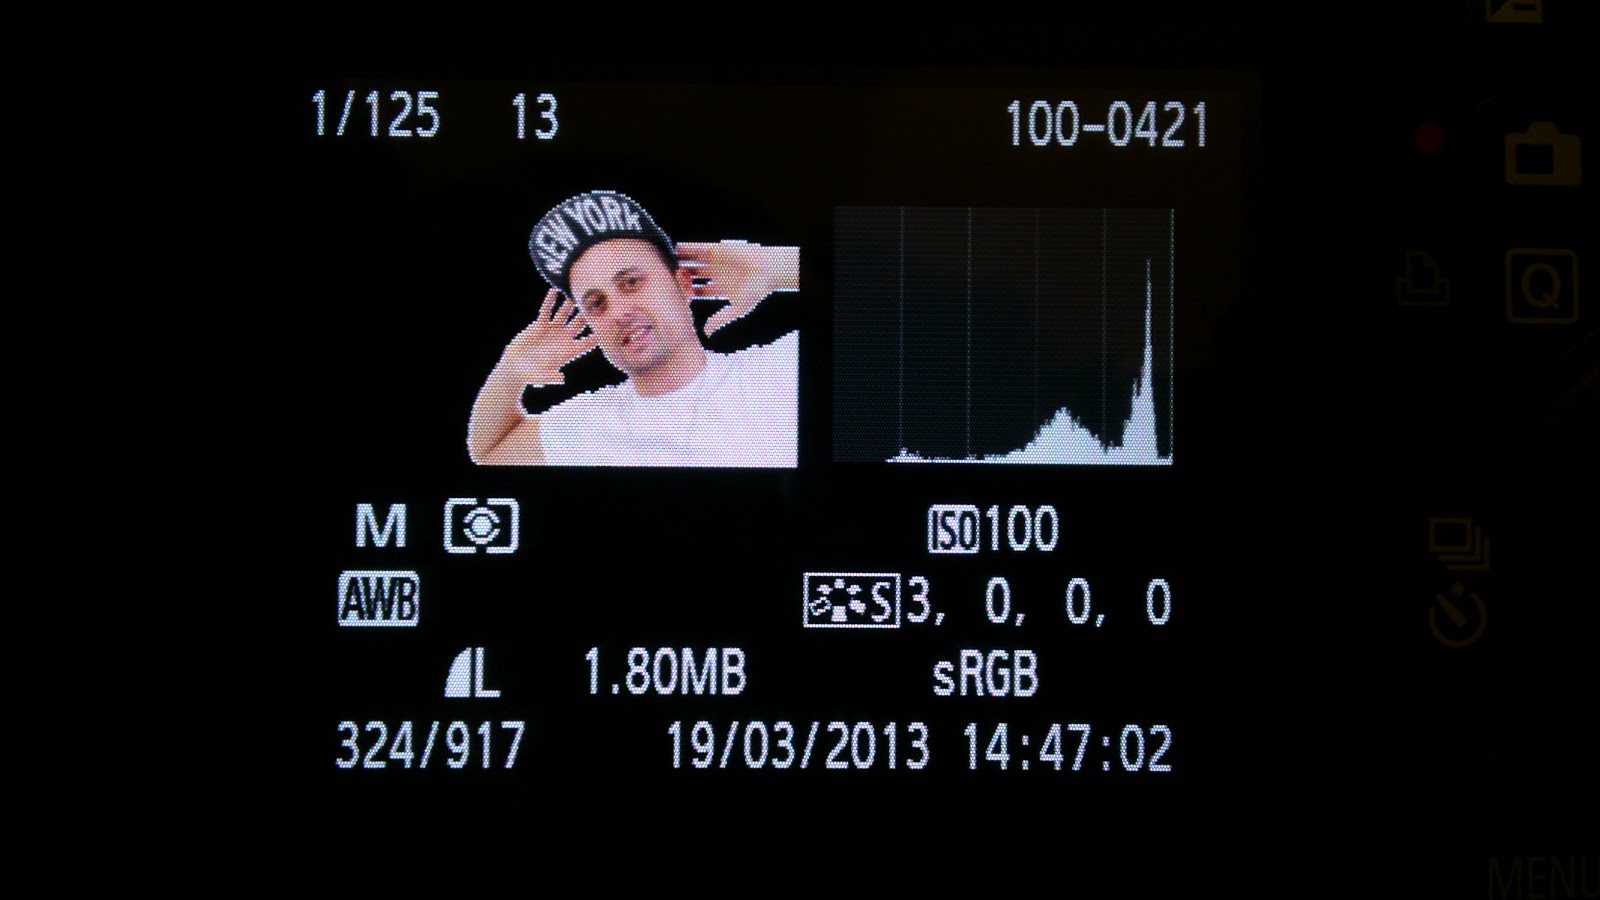
Then, I don't really know how powerful was the light early but when I came to shot again, someone before me turned down the power of the light. So after I took some image I recognized that they're underexposed, and as you can see on my camera settings (image 2), I started to change the f-stop by opening up the shutter from f/8 to f/6.3. But still that wasn't enough to let in more light therefore the images (2) are yet underexposed a little bit.


What I like in image 1 is that, how the light bouncing back from the scoop and shows the ergonomic and design lines on the helmet. What I like in image 2 is the shallow depth of field as the camera focuses on the lens and you can see the data on the chrome element while everything else is blurred. I reached this with the fairly low f-stop and high shutter speed. 


Image 1
Camera settings:

* f/8
* 1/125s
* ISO-100
* focal length 55 mm


Image 2
Camera settings:

* f/6.3
* 1/125s
* ISO-100
* focal length 24 mm


TASK TWO

This next part now is linking to client requirement a little bit because some of the college students from the graphic design department asked us to take images of their Coffee cups to their portfolio. So now, it's a little bit different because this is the first time I had a client and I should listen to her requests!! Mostly in client requirement the photographer has less freedom to create, because the client is who's telling what to shoot and what kind of looking he/she wants.

First, in a group we set up a studio around the product table. Here is the diagram of the lighting setup:
Note: The diagram doesn't show the spot light under the scoop that I used for back lighting. 


I've taken these images by using:


* product table
* 1 soft box

* silver reflector
* Canon EOS 550D


My client allowed me to create free and after thinking for few minutes I came up with a very good idea.
What does coffee always do??? - SPILL OUT...!


So I took the cups and some coffee beams and I arranged them in position so that makes the impression of spilling out coffee. Then I was trying different angles,formats and also I threw in some more coffee beams. This grayish background color worked well for these products. The images are brighten and upbeat. The green really stands out and the coffee beams give dynamic and vivify the photo. 


Image 1
Camera settings:


* f/8
* 1/125s
* ISO-100
* focal length 43 mm


Image 2
Camera settings:


* f/8
* 1/125s
* ISO-100
* focal length 40 mm


I'm very happy with the images. Both of them are dynamic. Image 1 is in landscape and I took it from a higher angle while image number 2 is in portrait format, more on the product level and it's bottom weighted as the gravitation pulling everything down. The falling beams on image 2 are leading your eyes and on the first image you can really understand what's going on. Finally, I think these camera settings worked well. 

Thursday, April 11, 2013

Product Photography

Product Photography
(Unit Content 1)

Product photography is one area of commercial photography. If something is commercial the photographer is paid for taking and post editing the images. Usually the advertising agencies pay to a photographer who takes pictures of their products.These images are made to illustrate,advertise and sell the products. A perfect product shot will entice someone to want that item and buy it. So these images need to properly display what the product is and make it attractive because product photography is all about the person who is buying what that photo represents. You can find most of the product images in brochures, catalogs and on online web stores, for example Amazon. 


Basically to take images of products you can start off with almost any digital camera,with just a seamless colored paper and use natural light. But in a professional studio like one above on the image, you can see there are several equipments that you could use for product photography.

Here's a rundown of the professional equipments:

Backgrounds:
  • Scoop/Product table: This white bent glossy table is the main area of product photography.
  • Light  tent: This is generally used for high key and good for reflective products (eg.:chrome). 
  • Colored plexiglass: This reflective glass shows both the reflective product and the shadowed areas which gives depth to the photo. So, this can be used when you want a more moody photo or more classy photo of highly valuable items.


Lighting:
  • Flash lights/continuous lights with beauty dish, softboxes,snoots, etc.
  • Gobos to block the light.
  • Lighting stands
A tripod is essential so you can move and adjust lighting and keep your camera consistent.
Also, don't forget that lots of products can't support themselves so you will need a stand or a special supporter to hold the product in place properly.

Steve Pankiewicz Photography

A few important info:
  1. Try to shot at about the same level as the product.
  2. Make the images bottom weighted, if the product is heavy. So leave more space at the top and less at the bottom. (Framing)
  3. Always clean the surface, remove the smallest bit of dirt and fingerprints.


Sometimes you need to show the detail of an item. These types of photographs are help to the customer to see the finer details and texture of the items because touch is one thing that photography will never provide.
So it's our job to really show what the buyer is getting.

Saturday, March 16, 2013

Lighting Techniques - High & Low Key

High key & low key photography
(Unit Content 2)

In this post I'm going to talk about what high key & low key photography is and how they create different effects. Also, I'll go over the light and camera settings and the equipments. So after reading through this post you shall know that how you can create nice and good images in high & low key.

High and low key photography are two effects in the photography world. Basically, these type of photographs either use extremely high levels of white or black. Both high key and low key images make an intensive use of contrast, but in very different way. This intensive contrast that both lighting create by using different lightings and different backgrounds help you to isolate your subject and make the viewers focus on your subject.

So... How the light can change the effect/the feel of an image?

High and low key lighting are typical examples of how a photographer can use lights to influence the viewers' emotions and perception of the subject mood. 


Let's start with...
HIGH KEY

What is high key photography?

High key photography is achieved by using lots of lighting. It seeks to eliminate harsh shadows and create bright environments. Overall, the images are very bright and contains lots of light tones and highlights with few mid tones and dark areas. No harsh shadows, the contrast is fairly low and usually the images have pure white (bleached out) background. It's generally used to convey happy, fun and beauty. High key (& low key) regularly used for model and for product photography.

Here is an example of a histogram for a high key image.


Lighting Equipment

The best way to produce high key images is to use flash lights.

* 3 or 4 flash lights     * Soft boxes     * Lamp stands     * White background     * Reflector

Lighting Setup

As you already know what equipments you need to use to create a high key image, now let's think about the setup. The image below, shows you a basic and the most popular setup for high key. With this method you can achieve the effect of the bright and shadow less lighting. Use 4 lights to produce a high key image, but don't worry if you have only 3 lights you can still achieve it.

Just to know that before I'll start explaining the diagram, the high key lighting is not always producing the high key effect, because it somehow can be lost if your model/subject consists lots of mid or dark tones.


First, position your subject in the center of the white backdrop. Next, setup two lights on your subject (45°) with soft boxes. The one on the right will be your key light and that's your main source of light on the subject. The one on the left will be your fill light which will eliminate the harsh shadows that the key light produces. Finally, set up two other lights in angle with soft boxes, facing at/lighting up the background. The back lights should be more powerful than the front lights.  (Note: If you're only shooting with the two front lights, you will get a gray, shadow filled background. An image with a gray background and with lots of mid tones called Mid key photography.)

In addition, there is a function in your camera that could help you in setting up the power of your lights and to get the correct camera settings. So after setting up the studio, take a test shoot then go to play images and press display twice (if you've got a Canon). You will see the actual image in a smaller format and the histogram of your image next to it. If you see that your screen is flashing in black at some point on the image that means those areas are totally white (bleached out/no details). So, if you can reached that to have all or most of your background flashing in black then you'll have the correct lighting set up. Try to avoid black flashing on your subject and watch out to don't over expose the image.


             <-- wrong -->


                -- right -->


Camera Settings

The camera settings are really depend on the lighting condition, but in studio I always start off with...

ISO 100     S/Tv  1/125th     F 8.0

...because it's a good starting point and if it's necessary I could always change the settings after I took some test shots. For high key try to adjust your camera right so that can let in lots of light. So leave the ISO at 100 because you're going to use 4 lights that produce lots of light. The 1/125th shutter speed is a good speed for portraits and long enough to let in light, then you just have to play with your f-stop to get the right exposure.


Let's
talk about...

LOW KEY

What is low key photography?

Low key photography is achieved by using reduced lighting. So the key here is to produce a dark image AND to use lighting in a very selective way so that only illuminates a specific portion of the image. As low key uses less lighting, the images have high contrast and they contain lots of dark tones and colors. The intense shadows become the primary element of the composition. These low key images convey a sense of drama or tension to the image. Overall, low key photography is a simple technique to create moody images and if you're doing portraits, the low key settings could allow you to show the texture of the skin.

Here is an example of a histogram for a low key image.


Studio set up

There are lots of ways to setup low key shots. First, make sure you have a seamless black background. The choice of light is up to you but make sure you avoid any light spillage onto the background. Also position your subject a bit away from the backdrop. These two things could help you to get a nice and totally black background because the camera won't pick up any detail from the back.

Here is a simple setup for low key.


On this diagram you can see that there is only one flash light on the right (45°). Make sure the power of the flash is turned down so it does not blow out your subject too much.

If you want to give some nice hair light or provide little back lighting try this setup..


The trick to get that kind of look you want is to manipulating your lighting and positioning your subject, so the shadows fall in the right spots. Just play around with different angle of lighting, modifiers (snoot,soft box,barn doors, etc.) and different intensities of flash to see their effects. 


Camera settings

 For low key shots, you can have variety of the camera settings. You'll have to play with the exposure and aperture to achieve the best effect for your particular lighting setup. The trick here is to minimize the light entering the camera while not making everything too dark. So, leave the ISO at 100 which keeps the image quality and avoid noise. Shutter speed 1/125th is a good speed for portraits.

TO SUM UP..

I did a little comparison diagram.

Monday, March 11, 2013

Research - Strobe Photographer

Edward Horsford
(Unit content 2)

Edward used sound trigger, strobes and one stick to take these images. He's using a custom made trigger that designed himself. He was shooting in the dark and he'd the strobes on lightstands and the SLR on tripod. 
Generally, he used smallish ballons. The ballons mounted on a stand or in the air. Most of his shots he had the ballons filled with water and with some dye. In addition, he always planned that how he's going to be shoot and what he wants to achive. Think of new angles, taken many test shots,experiment and post editing at the end. 

Now I'll show you some technique that he used and the results of his work.

Technique 1: This time he was about experimenting with extremes of color. He used yellow gel on one speedlite to color the background. The other speedlite used to illuminate the subject. The ballon had filled with dye. He also used black *gobos to prevent spill onto subject.


*gobo = is a short form of "goes between optics" as in something that goes between your light and your lens.  They are there to partially block light. 


On the left is an SB600 strobe set on 1/64th power. SB800 on the right, 1/64th with yellow gel.The red is his working space. Below is the result images of this setting and few other images using this technique but with different gel color.


Technique 2: Two speedlights placed at very acute angles to subject with gobos to prevent spill onto working area. Ballon filled with dyed water. 


SB600 on left and below on 1/64th power and SB800 on right and above on 1/64th.


Studio Techniques - Strobe

Studio Techniques
(Unit content 2)

There are many studio techniques that you could pick up in a studio. 
Like -  camera movements, differential focus, lighting ratios, freezing movement, motion blur, etc.

Here is a link that I found useful about lighting ratios. http://digital-photography-school.com/lighting-ratios-to-make-or-break-your-portrait

This time, I'm going to talk about how to freeze an action/movement. This is just one technique that I've learned in class. This topic is called...

Strobe Photography/High Speed Photography

Energie by Karjul's Photostream

Basically High speed photography is a technique of capturing motions (that's not visible to the naked eyes) with a very fast shutter speed or with strobe light. - What's strobe light? - As I mentioned in an earlier post, strobe light is a lamp that produces very short, intense flashes that has the ability to catch very fast actions. So, the extremely fast flashes of light and the duration of the flash that stops the action.

To freeze a movement you can use more or less any SLR camera and you can either use studio head/flash head or speedlite. Speedlite could be better to use because the speed of the light is way faster than the studio light's. You should need a flash trigger too that just pops on the hot shoe and all it does whenever you take a picture, it fires the flashes and illuminate your subject. Also, use a tripod to eliminate camera shake.


If you decided to use flash, it should be essential to be in a dark room as it allows you to set up your camera at a long exposure (5-10secs). It's recommended to use beauty dish/es for these type of images because it has the quality of light and it produces nice and crispy images. 

A scientist called Harold "Doc" Edgerton is widely considered by many as the father of high-speed photography. He invented the strobe which is the foundation for most high speed still imaging today.
Harold Edgerton's photographs proved that the speed of photography can be captured using the speed of light instead of shutter speed.

Harold Edgerton
Before I started capturing my own strobe photographs, I've been looking at other photographers' images, their techniques and the equipments they've used. 


Pomegranate Splash by Muhammad Ahmed


Blue Wall by Martin Gatz - (2 Vivitar 285 HV at 1/32 power. One from the left and one from above. All with snoot. No Photoshop tricks.)

Also, here are two videos about how to take high speed images. One's with flash and one's without flash.

http://www.youtube.com/watch?v=JUtrNJN_4zY  - flash
http://www.youtube.com/watch?v=89gdrdGUkSQ  - none flash

The next post will be a research of Photographer Edward Horsford who has perfected the art of photographing exploding balloons full of water. He freezes them as they leave his hands to explode.

"I'm trying to create works that are interesting and highly unique."


Sunday, February 24, 2013

Studio Equipments and Lightings

Studio Photographic Media, Techniques & Technology 
(Unit Content 2)

In a studio you could use different lightings and equipments to create different moods and effects to an image. Everything what goes onto the light called a modifier. These modifiers can affect the quality, temperature, direction and mood of a photograph. So by changing the modifiers can make such a big difference to an image.

 Now I'm going to show you some useful accessories and lighting types what you should have in your studio. Also I'm going to describe the effects of each modifiers and show some examples to see what results they give.
  • Accessories


                Tripod                                                                          Studio Stands


Flash transmitter/Flash trigger/Hot shoe                                  5 in 1 Reflector   


             Speedlite Flash                                                   Macro ring flash led light


                                                                                                                                   AC Slave Flash Lamp                                                                     Filters


               Product Photo Table                                                  Backdrop stand


  • Lighting types:    * Natural     * Artificial -->
  • Tungsten lighting - Tungsten lighting is a term used by photographers to distinguish from fluorescent lighting or strobe lighting. It's a continuous lighting and it's the same as your household lighting. The color temp is about 3200k which is quite warm and this causes the photos to have a strong yellow color cast. Tungsten lighting creates moody type photos , you can use tungsten for still, fashion, portraiture, wedding etc.

  • Strobe lighting/Flash lighting - A lamp that produces very short, intense flashes of light by means of an electric discharge in a gas. The ability of strobe lights to "freeze" the motion of rapidly moving objects by making them visible for only a fraction of a second makes them very useful in photography

  • Modifiers:
  • Soft box - This piece of equipment creates an even and diffused light by directing light through a diffusing material. It spreads light quite widely and it makes the shadows nice and soft. It comes in many shapes and sizes and it's perfect for portraiture.


  • Snoot - Snoot is a cone shaped object that creates spot light. Using a snoot allows the photographer to control the direction and radius of the light beam and also to stop spilling any light. Snoots are generally used in low key photography. Also, creates dark shadow so you can create very good moody and dark type of images.


  • Beauty Dish - It directs a flattering soft light, the beam can be directed to the subject well without spreading the light over a wide area. The parabolic shape creates a soft light what's perfect for portrait shots. It gives a classic look to the image as it wraps around the subject face.


  • Barn Doors - Barn doors allows to control the direction of the light beam. It can be use to create harsh shadows and give a moody feeling to an image. It is flexible to use and can create a focused light as well as a variety of shapes.

  • Honeycomb -  It"s an attachment for studio flash with a mesh across the front and is use to obtain a hard lighting effect with distinct shadows.